Like anything else in our homes, light switches can at times stop functioning. That’s why it’s important to know when and how to safely replace them. In this article, we’ll cover some light switch basics, how to identify a faulty switch and a handy guide to replacing light switches.
Switches: The Basics
A light is usually controlled by a single switch, mounted in a plastic or metal box in the wall. This switch has a lever which controls the flow of electricity – when flipped to the ‘on’ position it allows electricity to flow, when switched ‘off’ the lever breaks the circuit and the light goes out. A dimmer switch works in a similar way – when the sliding lever is moved up or down, the amount of current will increase or decrease to raise or lower the light. Light fixtures can also be controlled from more than one location with a two-way or three-way switch.
How Do I Know My Light Switch is Faulty?
Your light switch needs to be replaced if your light doesn’t turn on or off no matter how many times you flick the switch or turn the dimmer. You should also replace switches that are in poor condition, for example, if the dimmer toggle or switch is loose.
Tools/Parts You Might Need
To safely replace your broken or faulty light switch, you’ll need to ensure that you have the correct lighting components to do the job.
Here are some of the parts and tools you might need.
- A replacement switch or outlet
- A replacement switch or outlet cover
- Electrician’s tape
- Wire connecters or wire nuts
- Screwdriver (flathead or Phillips head)
- Lineman’s pliers
- A pair of needle-nose pliers
- Wire stripper or sharp knife
How to Replace Your Light Switch
Here’s our step-by-step guide on how to safely replace a light switch.
Step One
Safety is key when doing any DIY job involving electricity so before you do anything else, be sure to shut off the power to the switch. You can do this by finding your home’s fuse box or electrical panel and switching off all the circuit breakers or removing fuses until the light in question goes out. Then you know for sure, you’ve found the right one. This then needs to remain off while you replace your light switch.
Step Two
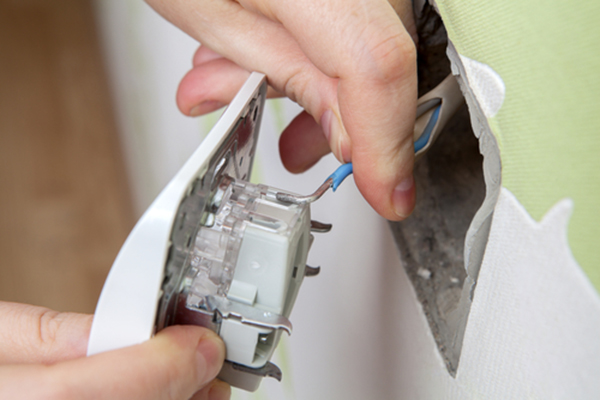
After shutting off the power, use a screwdriver to remove the plastic faceplate on your light switch and unscrew the existing switch from the electrical box. You can use an electrical tester to check the wires are not active.
Once you’re certain the wires aren’t live, use the screwdriver to remove the existing switch from its wires. If the wires are connected to terminal screws, turn the screws counterclockwise to loosen them and unhook the wires.
Step Three
Straighten or clip off the very ends of the circuit wires you will be connecting to your new switch and use wire strippers to remove around half an inch of insulation from the wire ends.
Step Four
Using needle-nose pliers, loop the bare or green grounding wire from the circuit clockwise around the green grounding terminal screw, and tighten the screw to lock the wire in place.
Step Five
If the switch has terminal screws, loop the circuit wires clockwise around the terminal screws and tighten the screws. If the switch has push-in terminal holes straighten the stripped tip of each circuit wire with lineman’s pliers and push the wires into the terminal holes.
Step Six
Mount the switch by folding the wires behind the switch and carefully pushing the switch into the box. Use the screws in the mounting slots to align the switch before screwing the switch into the box.
Step Seven
Screw the faceplate to the switch. You can now turn the circuit back on and test your new light switch! If your light doesn’t work, there may be a problem with the wiring or a fault with the light fixture itself.