Just like we clean our house or car or change the oil later, the computer also needs some maintenance so that it stays in good condition for as long as possible, and of course the PC is well maintained. Cleaning is a task that, although difficult and no one likes to do, it is necessary from time to time. In this article we are going to tell you all that you need to do and how to do the easiest and most secure way to completely clean and disinfect the inside of your computer.
CC Gadget, an online review site for PC hardware, reviews and researches the best components for gaming computers
The inside of the PC should be cleaned from time to time, but the cleaning that we all usually do from time to time we can say that it is “up” and not a complete cleaning, and that your computer is completely clean. To clean The first thing you should know is that you should disconnect each last cable, so that you can access all the corners of the interior and, let everyone know, you can clean the components yourself. ۔
To clean the PC, you need to separate all the components.
And that’s all we say. If you really want to have your device thoroughly cleaned, you’ll need to remove all components one by one (we have a guide to installing the PC that you can follow to reverse it.) ), And this includes removing the motherboard. Be able to properly clean the front and back as well as the metal plate on which it is mounted.
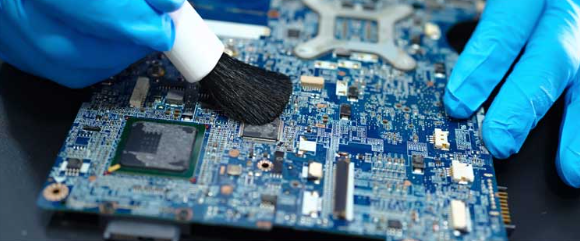
Mount Motherboard
It is very important that you remove all the fans and indeed the heat sink from the box so that you can take advantage and replace the thermal paste. Fans are because they are the components that move air inside and outside the box and therefore they are the components that generally collect more dust. Likewise, it may be a good idea to disconnect all cables to clean them, as they also tend to accumulate dust and dirt, even if it seems difficult.
How to clean PC and all its components.
There are many people who think that the compressed air spray inside the PC (or even with a vacuum cleaner) is already clean, but nothing can be further from the truth: Will be moving Other. Yes, we are going to recommend the use of compressed air in some steps of this guide, but only for specific things and in fact, we advise you to take it out if possible (since the dirt will come out which Will be split inside your house otherwise).
Clean the PC box.
We assume that you have already assembled all the components and you are about to clean the PC case, which should be done at this point with only the chassis and the sides separated. Here we recommend that you use a microfiber cloth with a little cleaning product (which can be a great dust remover) to clean both sides thoroughly, if necessary a sharp tool (such as a screwdriver) Always cover the driver to help you. Shred to reach difficult corners.
Clean the PC box.
As far as cleaning the rest of the box is concerned, the easiest thing to do now is to use a compressed air spray, always on the outside, to remove most of the dirt, and then as you go along with the side cover. What, clean the whole interior and exterior. Shredding with special emphasis on the grid, as this is where most of the dirt accumulates.
If your box is one of the hardest to reach, there is an alternative solution, although we do not recommend that it be effective. This solution, literally, consists of separating or sealing the connection panel (necessary) with insulating tape and removing all the dirt from the water by placing the box under the shower. Then it is important that the kitchen paper or anything similar is dried immediately, or that you have a hair dryer to help you. It’s quite radical and can damage your box (especially the connection panel), but it’s also effective. In any case, we reiterate that we do not recommend doing so.
Clean the heat sink or radiator.
Depending on the type of heat sink you have, cleaning may be easier or more difficult. If your heat sink is air and tower or double tower type it is quite easy to clean because literally, after disassembling it you can put it under the faucet and then dry it with kitchen paper and dryer. Can There is no risk of water spoiling anything because heat sinks have an anti-corrosion layer, and will not rust if dried.
Clean the PC heat sink.
If the heat is of the sink shell type, you can do it this way too, but be sure to separate the fan first, as it will be damaged if it gets wet. In any case you also have the option to gently clean it with a microfiber cloth and be careful not to bend any aluminum fins, if you want to remove most of the dirt from the initially compressed air spray. Can help you
If your heat sink liquid is cold and you need to clean the radiator, we do not recommend placing it under the faucet under any circumstances. What we recommend is to give.
For more valuable information visit the website